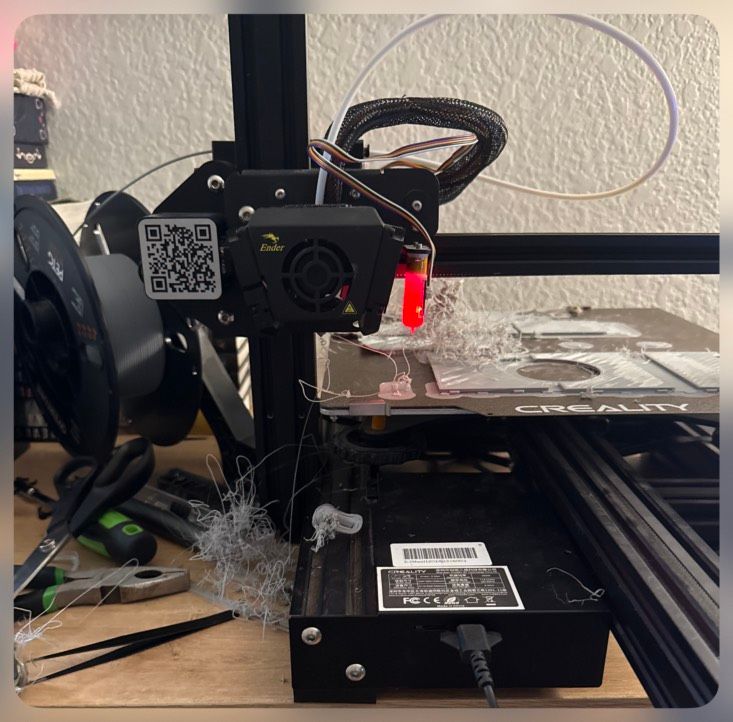
My little brother gifted me a 3d printer - a mostly stock Ender 3 Max V2. He recently upgraded to something newer and told me he just couldn’t get this one to work reliably.
I’m obsessed with this thing already—tool, toy, problem. When he gave it to me, he knew I was the guy who would get it working. Equal parts excited to pull me in, and immediately annoyed at how quickly I started making progress.
Most of the issues he initially had could have been resolved by directly connecting it to a computer—but when he was troubleshooting, that path wasn’t really available to him. The solutions I ended up using (and will later implement more cleanly) lean on some Linux knowledge and comfort setting up OctoPrint.
When I got my hands on it, the software side was mostly there.
My blocker?
A cable.
Finding a micro-USB cable that could actually handle data. I went through a few before realizing my dead gaming mouse had exactly what I needed. Trimmed some plastic, repurposed it—now it lives with the printer.
From there:Getting Cura configured correctly, identifying the right settings, enabling direct printing.
There were other approaches I could have taken—micro-SD being the obvious one—but it’s been years since I’ve even thought about those. I didn’t want to spend money yet, so I went with what I had.
It worked.
I have a 3d printer.It prints… okay.And when it prints, it’s tethered to my MacBook—my primary system.
Meaning:For multiple hours at a time, even days, my main machine is locked in place.Physically stuck.Short cable.Awkward positioning.Constant not-so-low-level “don’t bump this” anxiety.
But—it’s working.
And now I have concrete problems instead of abstract ones.
As I’ve been going:
- Successfully printing things, and learning slicing through doing
- Learning how the printer actually behaves
- Learning how it interfaces with everything around it
Features I don’t just want—but need:
- My MacBook back. If I leave, I need it.
- Less physical constraint (the current setup is fragile at best)
Features I want:
- Wireless printing
- Remote monitoring
So in short:It works.I’m learning.And I know exactly what’s annoying.
I found an old laptop.
Simple change, massive impact.
Now the printer has a dedicated machine, and my MacBook is free again. That alone shifted everything—it stopped being a workaround and started feeling like a setup.
I could focus on slicing more seriously, experiment with other slicers (now mostly using Orca), and start digging into calibration.
And this is where things went sideways.
Not immediately. Not dramatically.
But very, very definitively.
First real lesson: Z-offset matters.
When the printer lays down filament, it’s not just placing it—it’s pressing it into the previous layer. You can see it instantly in the first layer. Too high? Nothing sticks. Too low?
You are no longer printing.You are carving.
I went too low.
And my approach is always the same:Don’t overthink—just test print.
So I did.
And immediately turned the printer into a blunt, non-rotating CNC machine.
You can hear it before you fully process it. That dragging, resisting sound where there should be smooth motion. And there’s this half-second where your brain is like “that’s probably fine” before it catches up with reality.
It’s not fine.
I stop it. Look at the plate.
Gouged.
Alright. Lesson learned. Adjust offset. Rotate the plate so I’m not printing over the damage. Try again.
It works.
Good adhesion. Clean first layer. Problem solved.
I turn off the machine.
And that right there—that’s the mistake.
I didn’t save the setting.
Which didn’t even occur to me as a thing I needed to do. I changed it. It worked. Why wouldn’t it just… stay?
Next day:Start a print.
Same sound.Same problem.Worse result.
At that point it’s not experimentation—it’s a pattern.
Now both sides of the plate are damaged.
Not unusable—but permanently “experienced.”
From there I kept going.
At this point I’m working on a card shuffler for Magic the Gathering (which—if you’ve seen my portfolio—tracks).
Things are going well. I ordered new filament—some PETG, some PLA+.
Started with PETG (came with the printer), then switched to PLA.
And wow—PLA is forgiving.
It just works.
But there are tradeoffs, and a lot of what I want to build will require PETG.
So I switch back.
Mid-print—it fails.
Clog.
I haven’t fully gone down the research rabbit hole yet, but switching between PETG and PLA without properly clearing things out seems like asking for problems. PETG is stickier—it lingers, and if conditions aren’t right, it builds up.
So:
- First real teardown
- Take apart the extruder
- Replace the nozzle
- Swap the heater (not strictly necessary, but I had one)
Put it all back together.
Go to adjust the offset again…
And here’s the thing:
It’s been a week.
I no longer fully trust my understanding of what “positive” and “negative” mean in this context.
- Is negative pulling away from origin?
- Is positive pushing further down?
I pick one.
I am wrong.
Again.
The unintentional CNC returns, and I successfully damage the plate further.
At this point:Both sides are done.
I order a new build plate:PEI, magnetic, textured.
And immediately:Adhesion issues disappear.
It just works.
Also—because I paid for it—the lessons from before feel a lot more permanent.